
Eliminating a palm tree stump by hand could appear to be an overwhelming undertaking, yet dread not! In this far reaching guide, we’re going to set out on an excursion through the specialty of palm tree stump expulsion. You don’t require large equipment or an expert arborist to take care of business. With the right devices, a touch of muscle, and a hint of assurance, you can recover your yard and bid goodbye to that determined palm tree stump. In this guide, you’ll learn how to remove palm tree stump by hand.
How To Remove a Palm Tree Stump by Hand
Why Eliminating a Palm Tree Stump Matters?
Before we plunge into the functional strides of manual stump expulsion, it’s essential to comprehend the reason why eliminating a palm tree stump matters.
Safety: Stumps can be dangerous, particularly assuming that they’re concealed by congested grass or foliage. They present stumbling dangers to you, your family, and visitors, possibly prompting mishaps.
Finishing Opportunity: Sans stump soil is simpler to work with while arranging new finishing projects. Whether you need to introduce a flowerbed, another tree, or simply extend your grass, stump expulsion is the initial step to a fresh start.
Forestalling Regrowth: Whenever left untreated, palm tree stumps can grow new development, prompting undesirable and unattractive shoots that are trying to make due.
Upgraded Property Estimation: A very much kept up with yard with no noticeable remainders of old trees can fundamentally improve the check allure and generally worth of your property.
Steps to Remove a Palm Tree Stump by Hand
Here are a few steps required to remove a palm tree stump by hand:
1. Accumulate Your Instruments and Materials
Before you start the palm tree stump expulsion process, assembling every one of the vital instruments and materials is fundamental. Having the current right hardware will make the occupation more secure and more proficient. Here is an itemized rundown of what you’ll require:
Wellbeing Stuff:
Gloves: Put resources into a durable set of work gloves to shield your hands from rankles, splinters, and sharp instruments.
Security Glasses: Shield your eyes from flying trash and wood chips with wellbeing glasses or goggles.
Ear Security: In the event that you’ll utilize uproarious power devices like a trimming tool, think about wearing ear security to defend your hearing.
Tough Work Boots: Pick agreeable, slip-safe work boots with great lower leg backing to forestall wounds.
Cutting Instruments:
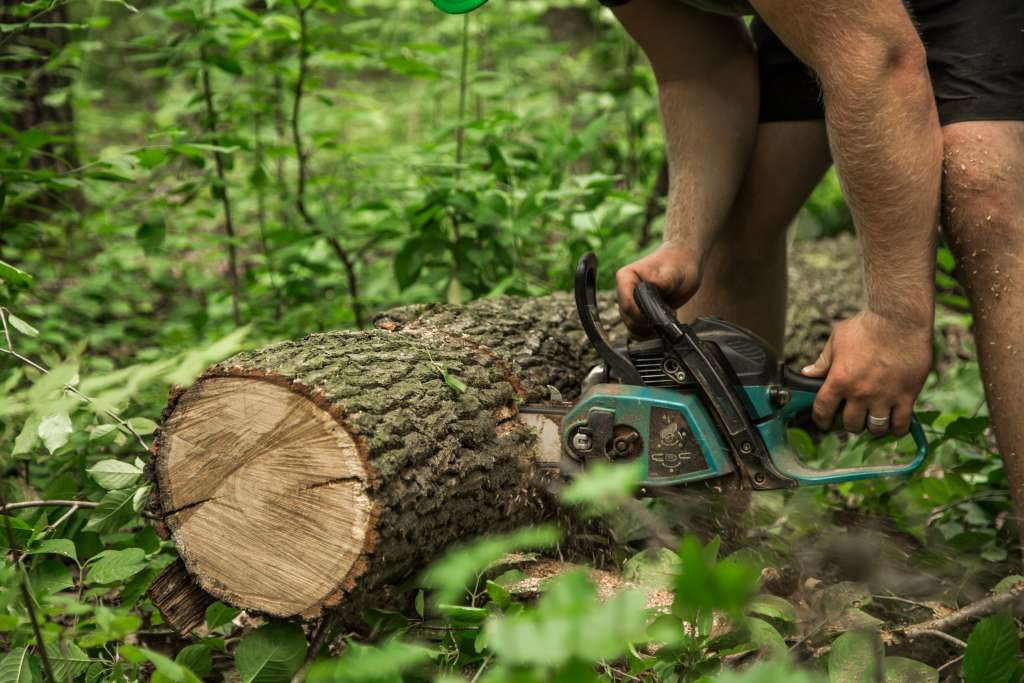
Trimming tool or Hand Saw: Contingent upon the size of the stump, you can involve a trimming tool for enormous stumps or a hand saw for more modest ones. Guarantee your saw is sharp for productive cutting.
Digging and Unearthing Instruments:
Shovel: A strong digging tool will assist you with exhuming the region around the stump and uncover the roots.
Mattock or Pickaxe: These instruments are fundamental for slackening the dirt around the roots and getting through compacted earth.
Pry Bar or Digging Bar: You’ll require these to lift and pry the stump whenever it’s relaxed.
Cutting and Pruning Instruments:
Loppers: Use loppers to slice through more modest roots and branches.
Pruning Saw: For thicker roots, a pruning saw will prove to be useful.
Root Saw or Responding Saw: At times, you might require an all the more useful asset like a root saw or responding saw for huge, difficult roots.
Wellbeing Markings (Discretionary):
Hailing Tape: Assuming that there are underground utilities or different dangers nearby, think about utilizing hailing tape to check their areas and keep away from mishaps.
Handcart or Truck (Discretionary):
A wheeled cart or truck can be helpful for moving garbage, soil, and the eliminated stump to a removal region.
Removal Technique:
Conclude how you’ll discard the eliminated stump. Choices incorporate leasing a branch shredder, sorting out for a mass waste pickup, or reusing the wood for different ventures.
Defensive Obstructions:
In the event that you’re worried about flying wood chips or garbage, you might need to set up defensive obstructions, for example, compressed wood sheets or canvases, around the workspace.
Medical aid Unit:
Continuously have an essential medical aid unit close by in the event of minor wounds.
Since you have your instruments and materials prepared, you’re completely ready to handle the palm tree stump expulsion process securely and successfully. In the accompanying segments, we’ll dive into the bit by bit process, offering master tips and direction en route. However, before we take care of business, how about we ensure we have all that we want to effectively follow through with the responsibility.
2. Survey the Stump
Before you plunge into the actual work of eliminating a palm tree stump manually, it’s vital to survey the stump’s size, condition, and environmental elements. This evaluation will assist you with arranging your methodology and decide the best procedures to utilize. This is the way to go about it:
Stump Size
Start by estimating the width of the stump. This will provide you with a feeling of how much work lies ahead. More modest stumps are for the most part simpler to eliminate physically, while bigger ones might call for greater investment and exertion.
Stump Condition
Inspect the state of the stump. Is it newly cut or has it been in your yard for some time? A newly sliced stump is generally simpler to eliminate on the grounds that the wood is milder and more sensible. More established stumps might have solidified, making the expulsion cycle really testing.
Superficial
Observe the stump’s level over the ground level. Assuming the stump is now sliced near the ground, it very well might be more straightforward to eliminate since there’s less wood to manage. In the event that it creeps over the ground, you’ll have to chop it down as close as conceivable utilizing a trimming tool or hand saw.
Roots and Root foundation
Cautiously assess the stump and the encompassing region for apparent roots. Note the course and thickness of the roots. This data will assist you with arranging your removal and root-cutting technique.
Consider whether the roots reach out past the stump, as you might have to follow and eliminate them to forestall future regrowth.
Soil Type
Evaluate the kind of soil in your yard. Sandy soil is for the most part more straightforward to dig through than clayey or compacted soil. The dirt condition can affect how rapidly you can exhume around the stump and release the roots.
Surroundings
Investigate what’s close by. Are there different plants, designs, or utility lines near the stump? Guarantee you won’t harm anything during the evacuation cycle, and think about defensive hindrances or markings if important.
Possible Difficulties
In view of your evaluation, distinguish any expected difficulties or snags you could experience during the evacuation cycle. This could incorporate rocks, covered garbage, or secret roots.
Evacuation Strategy
Think about the evacuation technique that best suits your stump’s size and condition. While this guide centers around manual expulsion, it’s fundamental to be ready to change your methodology if necessary.
Wellbeing Safeguards
Before you begin chipping away at the stump, survey your security stuff and ensure everything is in great shape. Guarantee you have the suitable individual defensive gear (PPE) for the gig.
3. Cut the Stump as Low as could be expected
Whenever you’ve surveyed the palm tree stump and assembled your devices, now is the ideal time to start the evacuation cycle. In this part, we’ll zero in on the pivotal step of cutting the stump as low as could really be expected. This underlying cut will set up the stump for exhuming and root evacuation.
Wellbeing First:
Prior to beginning, guarantee you are wearing the fitting security gear, including gloves, wellbeing glasses, and durable work boots. Twofold check that your cutting devices are in great working condition.
Decide the Level:
Inspect the stump and settle on the best level at which to cut it. Mean to slice as near the ground as conceivable while keeping a level surface. This will make the later strides of exhuming and root evacuation more reasonable.
Pick Your Cutting Instrument:
Contingent upon the size and state of the stump, select the suitable cutting device. A trimming tool is great for bigger stumps, while a hand saw functions admirably for more modest ones. Ensure the cutting instrument is sharp.
Clear the Region:
Eliminate any trash, free soil, or vegetation around the foundation of the stump to make a reasonable working region. This will forestall stumbling perils and permit you to see the stump’s surface obviously.
Take care of business:
Begin cutting the stump at the picked level. In the case of utilizing a trimming tool, move toward the stump from one side and make flat cuts. For a hand saw, make descending cuts, keeping the considered cutting edge to be level as could really be expected.
Take as much time as is needed and keep a consistent hand while cutting. Try not to push excessively hard, as this can tie the saw edge. Allow the apparatus’ teeth to accomplish the work.
Be ready for vibrations, particularly while utilizing a trimming tool. Immovably hold the apparatus with two hands and keep up with control consistently.
Actually take a look at the Advancement:
Intermittently pause and actually take a look at the profundity of your cut. The objective is to make a level and, surprisingly, surface. Make changes on a case by case basis to accomplish this.
Wellbeing Safeguards:
Continuously be aware of the area of your hands and body while cutting. Get them far from the slicing way to keep away from mishaps.
In the event that the stump has any nails or metal articles implanted in it, tread carefully, as they can harm your cutting apparatus.
Discard Cuttings:
As you gain ground with the cutting, put away the cuttings in an assigned region or in your wheeled cart or truck for removal later.
Clean and Keep up with Your Devices:
In the wake of finishing the underlying cut, clean your writing device and actually take a look at its sharpness. Dull instruments can dial back the cycle and be less protected to utilize.
Toward the finish of this step, you ought to have a palm tree stump that has been chopped down to the ideal level. This makes way for the resulting periods of root openness, root cutting, and at last, stump evacuation. Make sure to remain patient and zeroed in on keeping a level and, surprisingly, surface while cutting. In the following area, we’ll dive into presenting the roots to get ready for their evacuation.
4. Uncover the Roots
With the palm tree stump slice down to the ideal level, now is the right time to continue on toward the following period of the expulsion interaction: uncovering the roots.
This step includes digging around the stump to uncover the underground root growth, making it more straightforward to access and cut the roots in later stages.
Wellbeing Check:
Before you start unearthing, twofold check that you’re wearing your security gear, including gloves and wellbeing glasses.
Clear Trash:
Eliminate any excess cuttings or garbage from the region around the stump. A perfect work area will make exhuming more straightforward and more secure.
Recognize Root Bearing:
Look at the stump to get a feeling of the bearing wherein the roots are probably going to expand. Palm tree roots commonly develop radially from the foundation of the stump.
Begin Digging:
Utilize your digging tool to start digging a channel around the stump, pursuing the expected course of the roots. Begin at a sensible separation from the stump to try not to harm the roots rashly.
As you dig, be aware of the profundity and point of your channel. You need to make a continuous slant that uncovered the roots without harming them.
Eliminate Soil Bit by bit:
Gradually eliminate the dirt from around the roots, working your direction nearer to the stump. Be patient and delicate to try not to incidentally cut or harming the roots.
Contingent upon the size of the stump and root foundation, this cycle might take some time. Enjoy reprieves depending on the situation to forestall weariness.
Utilize the Mattock or Pickaxe:
At the point when you experience attaches that are challenging to eliminate with the digging tool, change to the mattock or pickaxe. These instruments are phenomenal for getting through compacted soil and cutting little roots.
Cautiously work on the dirt and uncover the roots as you work your strategy for getting around the stump.
Keep a Protected Separation:
While uncovering the roots, guarantee that you avoid the stump. Try not to stand straight over the presented region to forestall mishaps in the event of any abrupt root development.
Review the Root foundation:
As you progress, examine the uncovered root foundation for size, thickness, and any inconsistencies. This data will assist you with arranging the root-cutting stage.
Save Close by Plants:
Assuming there are close by plants or arranging components you need to protect, take additional consideration not to harm their foundations while uncovering around the palm tree stump.
Remain Hydrated and Enjoy Reprieves:
Manual stump expulsion can truly be requested. Remain hydrated, and make sure to brief breaks to rest and recover if necessary.
5. Start Root Evacuation
Now that you’ve effectively uncovered the foundations of the palm tree stump, now is the ideal time to continue on toward the root evacuation stage. This step includes cutting and, now and again, releasing the roots to make it conceivable to physically remove the stump.
Security Stuff Update:
Prior to continuing with root evacuation, affirm that you’re wearing your wellbeing gear, including gloves and security glasses.
Survey Root Thickness:
Investigate the uncovered roots and decide their thickness. More modest roots can frequently be cut with loppers or a pruning saw, while bigger roots might require more strong devices.
Use Loppers or Pruning Saw:
Begin by slicing through the more modest roots utilizing loppers or a pruning saw. Make perfect, exact slices as near the stump as could really be expected.
Start with the roots closest to the stump and work your direction outward. This step might require some investment, so be patient and purposeful.
Manage Bigger Roots:
For bigger roots that won’t be quickly cut with loppers or a pruning saw, you’ll have to utilize all the more amazing assets. A root saw or responding saw can be viable for this reason.
Move toward these roots with alert and guarantee you have a protected hold on the device. Make cautious, controlled slices to stay away from any incidents.
Relax Soil Around Roots:
As you slice through the roots, utilize your mattock or pickaxe to slacken the dirt around them delicately. This will make it more straightforward to access and cut further roots.
Keep away from over the top power, as you would rather not harm the roots or weaken the stump rashly.
Follow and Cut Expanding Roots:
On the off chance that the roots reach out past the channel you at first dug, follow them back to the stump and slice them as near the stump as could be expected. This forestalls regrowth and guarantees a more intensive expulsion.
Check for Strength:
Occasionally take a look at the dependability of the stump. Assuming that it starts to feel flimsy or free, it’s an indication that the roots are adequately cut and relaxed for evacuation.
Remain Protected During Cutting:
Be aware of your body situating while at the same time slicing roots to keep away from mishaps. Keep hands and body parts from cutting away.
Discard Cut Roots:
As you cut roots, put them away for removal. You can add them to your trash heap for later evacuation.
Be Patient and Industrious:
Root evacuation can be a tedious cycle, particularly for bigger stumps with broad underground roots. Remain patient and industrious, zeroing in on each root in turn.
6. Release the Stump
Now that you’ve effectively uncovered and cut the underlying foundations of the palm tree stump, now is the right time to continue on toward the urgent step of relaxing the stump starting from the earliest stage. In this segment, we’ll investigate how to utilize devices like a pry bar or digging bar to lift and free the stump.
Security Stuff Check:
Prior to beginning this stage, affirm that you are as yet wearing your fundamental wellbeing gear, including gloves and security glasses.
Evaluate the Stump’s Solidness:
Start by testing the dependability of the stump. Attempt delicately shaking it this way and that to check whether it moves without any problem. Assuming it does, this is a positive sign that the roots are adequately cut and relaxed.
Pick the Right Instrument:
Contingent upon the size and weight of the stump, select either a pry bar or a digging bar. A pry bar is great for more modest stumps, while a digging bar is more reasonable for bigger, heavier stumps.
Position the Bar:
Position the bar under the edge of the stump, near where you’ve been cutting the roots. Guarantee that the bar is safely wedged underneath the stump.
Use Influence:
Apply descending tension on the bar’s handle to make influence. This ought to lift the stump somewhat out of the ground. Be mindful not to overexert yourself, particularly assuming that the stump is huge.
Shift the Bar:
In the event that is essential, reposition the bar at an alternate point under the stump and apply pressure again to lift it further. You might have to rehash this cycle a few times, working your strategy for getting around the stump.
Pry the Stump:
When the stump is adequately lifted, utilize the bar to pry it upwards and into a more healthy place. This might require some work, so take as much time as is needed and utilize controlled developments.
Watch for Development:
Watch out for the stump as you work. Assuming it begins to move or shift, be ready to change your activities to keep it from falling in an uncontrolled way.
Request Help (if necessary):
On the off chance that the stump is especially enormous or weighty, think about enrolling the assistance of a companion or relative to help with the lifting and prying. Wellbeing ought to constantly be vital.
Fill the Opening For a brief time:
Subsequent to eliminating the stump, the opening left in the ground will be very perceptible. Briefly fill the opening with soil or rock to guarantee it’s anything but a stumbling peril.
Toward the finish of this step, you ought to have effectively released and eliminated the palm tree stump from the beginning. The most truly requesting some portion of the interaction is presently finished. The following segment will cover the last strides of filling the opening and finishing the cleanup to reestablish your yard to its previous greatness.
7. Eliminate the Stump
Wellbeing Check:
Start by guaranteeing that your security gear, including gloves and wellbeing glasses, is still set up and looking great.
Lifting the Stump:
Cautiously lift the released stump into a more healthy place. In the event that the stump is especially weighty, think about utilizing a second individual to help you with the lifting.
Keep up with legitimate lifting strategies to safeguard your back and stay away from strain. Twist your knees and keep your back straight as you lift.
Investigate the Opening:
Subsequent to eliminating the stump, pause for a minute to review the opening left in the ground. Guarantee there are no secret impediments or flotsam and jetsam that could represent a peril.
Secure the Stump:
Set the eliminated stump in a protected and stable area away from the workspace. This could be an assigned flotsam and jetsam heap or a region for later tree removal.
Fill the Opening:
Utilize the dirt or rock that you briefly positioned worse than broke (as referenced in Area 6) to totally fill it. Pack down the dirt as you go to guarantee it’s compacted and level.
Reclamation and Cleanup:
Return any uprooted plants, finishing highlights, or designs to their unique positions assuming they were briefly moved during the stump expulsion process.
Eliminate any defensive boundaries or markings you set up around the workspace.
Discard the cut roots, garbage, and any leftover materials from the stump expulsion. You can consider leasing a tree shredder for the branches and more modest wood pieces, and set up for mass waste pickup for bigger things.
Post-Expulsion Care:
Consider adding new dirt and grass seed to the region where the stump was taken out to advance regrowth and reestablish the presence of your yard.
Water the region routinely to empower new grass or vegetation to flourish.
Observe Your Accomplishment:
Eliminating a palm tree stump by hand is very difficult, so pause for a minute to praise your diligent effort and the change of your open air space.
8. Last Advances and Cleanup
With the palm tree stump effectively eliminated and the opening filled in the past segment, now is the ideal time to wrap up the undertaking for certain last advances and exhaustive cleanup. These means will guarantee your yard is protected, clean, and prepared for future arranging projects.
Examine the Workspace:
Start by examining the whole workspace for any devices, garbage, or free soil that could have been abandoned. Eliminate any things that could present stumbling risks or disrupt the scene.
Reestablish Finishing Components:
Assuming you need to briefly move any plants, stones, or other arranging highlights, right now is an ideal opportunity to return them to their unique positions. Guarantee everything looks as it did before the stump evacuation.
Check for Buried Roots:
Twofold check the region around the eliminated stump for any secret roots that could have been abandoned during the underlying cutting and expulsion stages. Eliminate any leftover roots to forestall regrowth.
Discard Trash:
Appropriately discard all the garbage from the stump expulsion process. In the event that you utilize a tree shredder, assemble the wood chips for later use in your nursery or dispose of them as per nearby guidelines.
Plan a mass waste pickup or set up for the dependable removal of any bigger parts of wood or root material.
Clean and Store Instruments:
Completely spotless every one of the instruments you utilized during the stump expulsion process. Eliminate any soil, sap, or buildup to forestall harm and rust.
Store your devices in a dry and secure area, guaranteeing they are prepared for sometime later.
Post-Expulsion Care:
Consider the post-evacuation care of the region where the stump was found. You can add dirt to even out the area and advance regrowth.
Assuming you want, plant grass seed or put in new plants in the space to reestablish the feel of your yard.
Water and Keep up with:
Water the treated region routinely to empower new grass or vegetation to lay down a good foundation for itself. Adhere to a particular consideration guidelines for the sort of plants you’ve presented.
Keep on observing the region for any indications of regrowth from the excess underground root growth and speedily address any new development.
Partake in Your Changed Yard:
Pause for a minute to see the value in the distinction in your yard now that the palm tree stump has been taken out. Your open air space is liberated from the unattractive stump and prepared for your next arranging experience.
Share Your Experience:
Think about imparting your experience to companions, family, or individual Do-It-Yourself lovers. Your example of overcoming adversity could move others to handle comparable undertakings.
By finishing these last advances and guaranteeing an intensive cleanup, you’ll have a perfect yard as well as a feeling of achievement from an effective Do-It-Yourself palm tree stump expulsion. With legitimate support and care, your finishing will prosper, and your outside space will be prepared for every one representing things to come, ventures and exercises you have as a top priority.
Conclusion
Congrats! You’ve effectively figured out how to eliminate a palm tree stump the hard way, changing your open air space and beating a difficult Do-It-Yourself project.
All in all, eliminating a palm tree stump by hand is a remunerating venture that yields both commonsense and individual advantages. Your yard is presently changed, and you’ve acquired important abilities and bits of knowledge en route. With a feeling of achievement and freshly discovered information, you’re good to go for future Do-It-Yourself projects and the difficulties they might bring. Cheerful cultivating and arranging!
FAQs
Is it truly important to eliminate a palm tree stump, or could I at any point leave it in the ground?
Leaving a palm tree stump in the ground is an individual decision, however there are a few motivations to think about evacuation. Stumps can be unattractive, present stumbling dangers, and may hold onto vermin or infections. Moreover, eliminating a stump takes into consideration better use of the space for finishing or different purposes.
Might I at any point utilize substance stump removers rather than manual evacuation?
Compound stump removers are a choice, however they have a few downsides. They can consume a large chunk of the day to work, may not be successful on specific palm tree species, and can have ecological contemplations. Manual expulsion offers more control and prompt outcomes.
What amount of time does it require to eliminate a palm tree stump the hard way?
The time expected to eliminate a palm tree stump by hand fluctuates relying upon factors like stump size, root foundation intricacy, soil type, and your experience. More modest stumps might require a day or less, while bigger ones can require a few days to seven days.
Will I reuse the wood from the palm tree stump?
Indeed, you can reuse palm tree wood for different Do-It-Yourself projects, for example, creating, carpentry, or even as kindling. Remember that palm wood is moderately delicate, and the nature of the wood can differ contingent upon the species and age of the tree.
How would it be a good idea for me to respond on the off chance that I experience underground utilities while eliminating a stump?
Wellbeing is central while experiencing underground utilities. Assuming you find utility lines while digging, stop work right away and contact your nearby service organizations to stamp the lines. Try not to endeavor to dig close or around them. Tread carefully and focus on security in such circumstances.